



Custom Coin Artwork & Production Art
Great custom coins start with artwork that can actually be manufactured. A logo or sketch may look perfect on a screen, but production artwork has another job: it tells the factory how the finished metal coin should be built.
Coinable can work from finished artwork, logos, sketches, photographs, reference images, previous coin designs or a basic idea and develop the project into a production-ready proof.
From concept to production-ready coin art.
The artwork stage translates visual intent into manufacturing instructions: shape, relief, color, finish, lettering, front/back orientation and specialty features.


What can I send to start a custom coin design?
Useful starting material can include:
- Vector logos or finished graphics
- JPG, PNG or PDF artwork
- A hand-drawn sketch
- Photographs or reference images
- Unit, organization or company emblems
- Text, dates, mottos and names
- Photos of an existing coin you want to reorder or update
- A written description of the concept
You do not need to solve every manufacturing detail before starting. The artwork stage is where the visual idea and the physical coin begin to come together.
Graphic artwork vs. production artwork
A normal graphic design describes how something should look. Custom coin production art also describes how it should be manufactured.
The proof may need to define:
- Overall diameter and shape
- Front and back orientation
- Raised metal areas
- Recessed metal areas
- 2D or 3D relief
- Enamel or printed color locations
- Plating and metal finish
- Edge treatment
- Cut-outs or openings
- Numbering or engraving
- Specialty construction features
That manufacturing information is what turns a flat concept into tooling, metal, relief and finish.
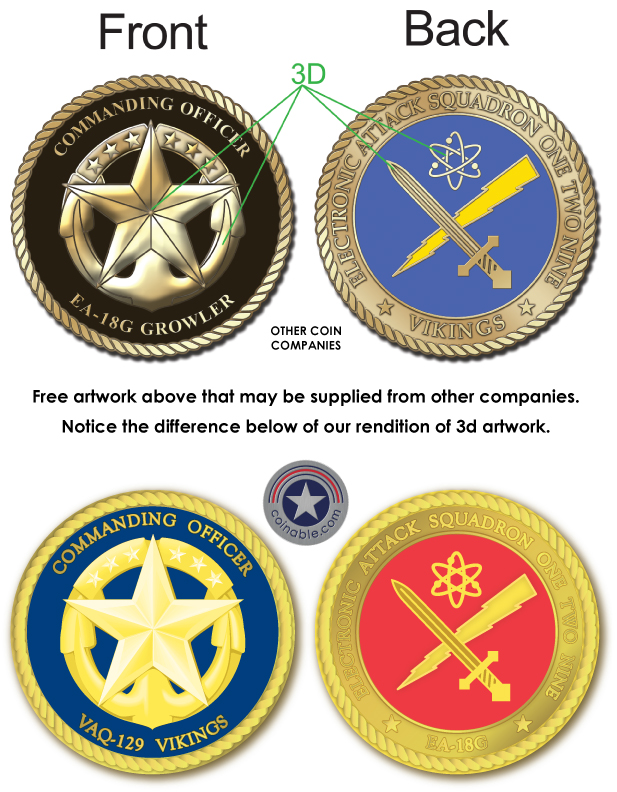
2D custom coin artwork
2D relief uses clearly defined raised and recessed levels. It is well suited to logos, lettering, emblems, seals and bold graphic elements where crisp separation is important.
A strong 2D coin design usually relies on clean silhouettes, readable lettering and intentional separation between metal and color areas.
3D custom coin artwork
3D relief uses sculpted contours instead of only flat height levels. It can add depth to faces, figures, buildings, vehicles, terrain, objects and other dimensional artwork.
3D artwork can also be combined with flatter 2D elements when a design needs both sculptural depth and sharp lettering or borders.
Designing the front and back together
A custom coin is a two-sided object, so both sides should be planned as one project. The front may carry the primary emblem or presentation artwork while the reverse can hold a motto, location, anniversary, unit information, recognition message or a second visual.
The artwork process also checks how borders, text, edge features and relief interact around the entire coin.
Artwork for enamel and printed color
Color needs to be planned around the manufacturing method. Enamel is placed into defined areas of the coin, while printed details can support artwork that requires a different visual treatment.
When color is part of the project, the proof identifies where color belongs and how it works with the selected metal finish.
Compare custom coin metal finishes
Artwork for special-shaped coins
A special-shaped coin is not limited to a circular border. The outside profile can become part of the artwork itself, allowing badges, shields, equipment, mascots, maps, symbols and other silhouettes to define the finished piece.
Special shapes may also incorporate cut-outs, sculpted areas and other dimensional features where the production method allows them.
Learn about custom coin sizes and shapes
What should I review on the proof?
Before approving custom coin artwork, review the complete project carefully:
- Spelling and punctuation
- Names, dates and numbers
- Front and back orientation
- Coin size and shape
- Raised and recessed details
- 2D and 3D areas
- Metal finish
- Color placement
- Edge treatment
- Specialty features
Production follows the approved proof, so artwork approval is the key checkpoint before tooling and manufacturing begin.
What happens after artwork approval?
Once the proof is approved, the project can move into die or mold creation, striking or casting, plating, color application, finishing, inspection and packing.
See the complete custom coin manufacturing process
Start with what you have
You do not need factory-ready files to begin. Bring the best artwork, reference or idea you have and use MINI BOSS – Custom Coin Maker to define the physical coin around it.
Use the MINI BOSS – Custom Coin Maker to start a project, visit the Custom Coins FAQ, or read the Complete Custom Coins Design & Manufacturing Guide for a broader overview.